
Projects with 9010's profiles
- Products
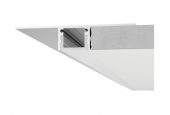
P012
Professional installation
Few and precise instructions to get long-lasting and esthetically perfect results with ALUMITE® profiles. The fastening of the profiles to the plasterboard can be carried out with common self-tapping screws spaced no more than 22 cm from each other. Using Uniflott and Fugenfueller from the company KNAUF for filling and finishing, a professional installation is guaranteed.
1. Fix with screws.
2. Position the disposable screen.
3. Plaster.
4. Colour.
5. Cut and remove the disposable screen.
6. Insert LED.
7. Apply the final screen.
Installation on brickwork
Our profiles P002 – P003 – P004 - P012 - P013 can be installed into brickwork and concrete wall or ceiling with standard tools present on all building sites and do not need the housing box.
1. Arrange wall chases.
2. Fix with screws.
3. Plaster.
4. Remove protective screen only after the final painting.
Quick installation with P012 - P013
9010 presents the P012 and P013 profiles with direct light respectively with a 15 and 30 mm length allowing for considerable time saving during installation, in particular when creating the ceiling or wall supporting structure.
1. The P012 and P013 profiles can be fixed directly to the structure.
2. And be plugged subsequently with 12.5 mm plasterboard sheets.